Beam Combiner Upgrade DIY

If you have made Upgrades and/or Modifications to your machine, let us know about them here.
Post Reply
Vinito Frankovich
Posts: 26
Joined: Wed Mar 10, 2021
Location: Kansas City
Country: United States
Laser Machine Make or Type: Chinese
Laser Power: 80W
Laser Bed Size: 28" x 20"
Home Position: TR
Control Software: RDWORKS
RDWorks Version: 8.01.52
Ruida Controller: RDC6442
Windows Version: 10
Accessories: Working on adding Z-axis motor. I'm new, so nothing else yet

I was away from my laser for several months and now that I'm turning attention back to it, I decided to dive into a few upgrades I've had on my mind for a while. This approach is by design as 1) I'm new to it all, so what do I know? - nothing much, so spending some time with it before dreaming up arbitrary projects don' make no sense, i.e. 2) I kinda like to wait until a problem begins to bother me before solving it.

Anyway, I am upgrading mirrors & lenses (only came with 1.5 FL to begin with, so adding another to make for better cutting whould be pleasant), upgrading the air assist, replacing the tube (no surprise, fortunately), modifying the head mount to add z-axis position adjustment, and today's subject: adding a beam combiner to upgrade the pointer usability.

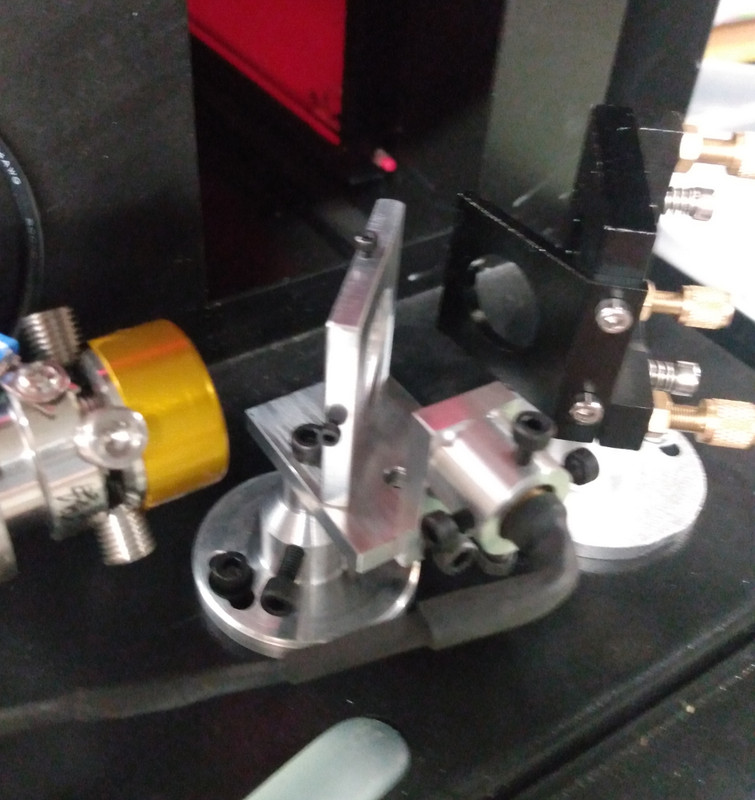
I looked and found that the ones available to purchase were very pricey for what they were as well as bulky. Also the combined 1st mirror/combiner combo looked like it had inherent ease-of-use problems designed in. I'm a tad cramped for space, and I'm a machinist, so I built this mount which is pretty tight while not being cramped. Looking at it now, I could even make it even tighter with no sacrifice, but it's fine so this is the final design. Rather than springs and screws for adjustment, which admittedly would probably be slightly easier to shift the aim of the pointer, this one is still relatively easy to shift. And once you consider the typical locknut design for your typical adjuster, it's about a wash really as the lock is kinda built-in to the design.

Image

Image

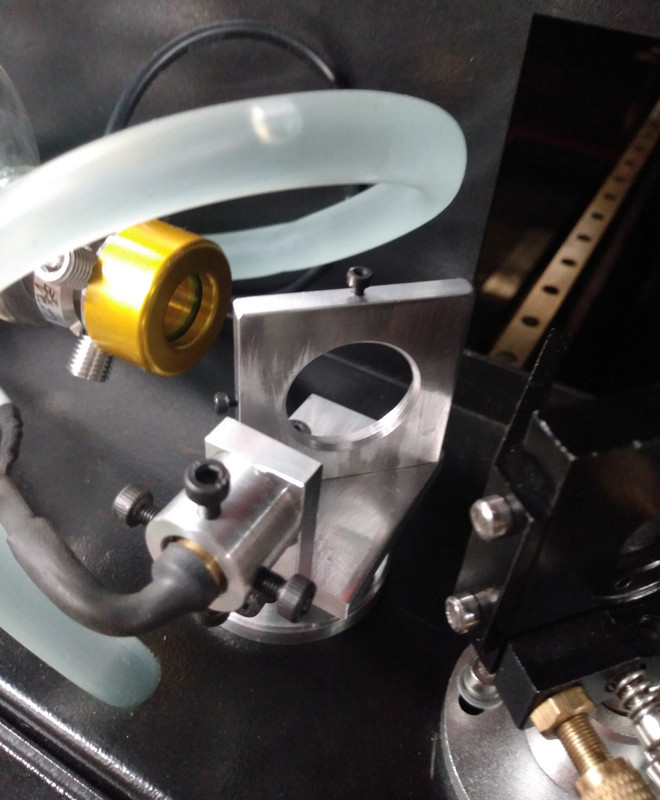
The thickness of the mirror mount is as minimum as I could manage and I chamfered the downstream side of the hole for more clearance, both features maximizing clearance around the beam, i.e. less chance of obstructions that the beam can reach.
I'm using the mounted combiner lens from American Photonics so I opted for an edge-clamp screw arrangement since the mounted lens can handle that without distorting. Just two small 2mm screws to hold the lens in place.
The way the laser pointer mounts is that it slips through an o-ring at the front end of the bored cylinder thing and that holds it securely in place that it doesn't move yet allows a pivot point, then the opposed screws at the rear are used in tandem for shifting/locking the aim.
The left/right and up/down position of the mount are both adjustable for setting the combiner lens centered nicely on the CO2 beam (basically a clone of the typical 1st mirror mount)

Anyways, it turned out kinda nice so I thought I'd share. Maybe the concept of this pointer will jog some creativity for others to improve on.
Vinito Frankovich
Posts: 26
Joined: Wed Mar 10, 2021
Location: Kansas City
Country: United States
Laser Machine Make or Type: Chinese
Laser Power: 80W
Laser Bed Size: 28" x 20"
Home Position: TR
Control Software: RDWORKS
RDWorks Version: 8.01.52
Ruida Controller: RDC6442
Windows Version: 10
Accessories: Working on adding Z-axis motor. I'm new, so nothing else yet

D'oh!
I guess I'm not really surprised, but I just today discovered that Russ already did this a couple months ago on a video. He also did a little better job of it, though maybe not as "tidy". He even used a really similar O-ring retaining feature like I did... or I used one like he did or whatever. Anyways, mine WAS legitimately done before I saw what Russ did, but I like a couple of his design elements and I may upgrade mine to incorporate, namely the spring opposite the adjuster screw idea.

Last night I got the pointer all aligned with the CO2 beam pretty nice. At least I had thought through the parallel + centered stuff before seeing Russ's video, which makes me feel smart 'er sumethin'. I must say, I really do like how the pointer works through the beam combiner much better than that hacky angled nozzle bracket thing.

Russ's video on this stuff in case you're curious:
https://www.youtube.com/watch?v=xPlhrEyZDZk
Post Reply

Return to “Upgrades and Modifications”