Page 8 of 9
Re: 450 X 900 60 watt build.
Posted: Mon May 03, 2021
by Rodney Edington
Since cutting the acrylic, the fume extraction didn't work all that well, and I haven't tried to use it at all since. The acrylic smell hung around in the house for about 12 hours. So I started on enclosing all of it and going to have a second exaust on it.
Ran out of the stainless screws and will have more on Tuesday.
On the front, I have almost a 1" gap on the door for incoming air to sweep across the top of the bed.


The plan is to have a glass window on the canopy. Need some more aluminum sheet to finish the top and figure out how I'm going to do the window

Here is the back

With the tube door open. You can see the water pressure switch I installed on the right side at the tube water inlet. Need to pull the tube again so I flip it on it's back to enclose the bottom


Re: 450 X 900 60 watt build.
Posted: Mon May 03, 2021
by Rodney Edington
I printed some tubing holders for tubing management. You can also see my visual water meter with temp probe in it.


I ordered a 400 cfm, 8 speed inline fan from Amazon for the second extraction fan.
https://www.amazon.com/dp/B07FPFVZTZ?ps ... ct_details
Re: 450 X 900 60 watt build.
Posted: Mon May 03, 2021
by Gene Uselman
Nice and tidy Rodney- I used a very similar fan on my daughter's 24x36 100w laser and it does the job very well and quietly. I don't see your exhaust outlet- the placement will be important to air flow in the cabinet. And I would have both panels in the door clear acrylic- even it you have to cross brace it for stiffness- if you silicone the acrylic into the extrusions it will be very solid.
Re: 450 X 900 60 watt build.
Posted: Tue May 04, 2021
by Rodney Edington
Gene Uselman wrote: Mon May 03, 2021
Nice and tidy Rodney- I used a very similar fan on my daughter's 24x36 100w laser and it does the job very well and quietly.
Thanks Gene. The skin came out a lot better than I thought it would. I picked the fan I did because of the high reviews it had.
Gene Uselman wrote: Mon May 03, 2021
I don't see your exhaust outlet- the placement will be important to air flow in the cabinet.
It'll be on the bottom back. The air should flow across the top of the bed and to the bottom and out.
Gene Uselman wrote: Mon May 03, 2021
And I would have both panels in the door clear acrylic- even it you have to cross brace it for stiffness- if you silicone the acrylic into the extrusions it will be very solid.
After reading this, I look to see if I had any pieces large enough and I did have one for the top. I'll have to get a piece to do the front later. I'll put the aluminum piece back in for now.
Re: 450 X 900 60 watt build.
Posted: Tue May 04, 2021
by Rodney Edington
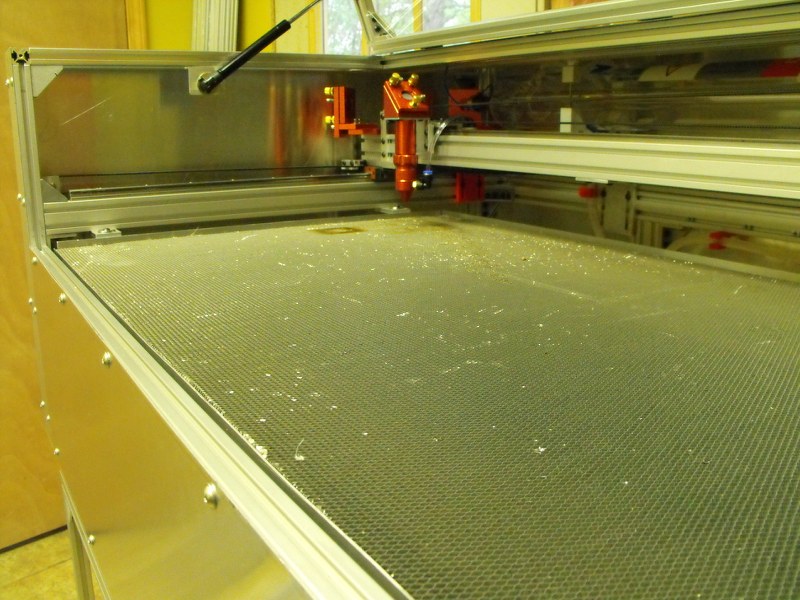
Acrylic window in place but not sealed yet.

This is about where the bed will be when cutting. I should get great air flow across the top of it once I have the duct installed.
Re: 450 X 900 60 watt build.
Posted: Wed May 05, 2021
by Rodney Edington
The bottom is done and sealed up. I went looking for a 2"X24" HVAC floor vent for 6" vent pipe, but had no luck finding one off the shelf. Could of have one custom made, but the cost was way too much. I had this 4"X16" left over from when I built the house and it should work almost as well.
I screwed up the 4" pipe I had on the bed, so I need to get some more to replace it. I stuck a straighten out elbow on it for now.


Re: 450 X 900 60 watt build.
Posted: Sun May 09, 2021
by Rodney Edington
Re: 450 X 900 60 watt build.
Posted: Thu May 13, 2021
by Rodney Edington
Have all the exaust venting done, but it has been somewhat of a nightmare trying to find all the right fittings off the shelf. Originally, I was going run both the 6" and the 4" to the outside separately. While getting some supplies, I started piecing parts together and decided to try to get both into one vent to the outside. The 6" going up is the cabinet exaust and the 4" is the bed exaust. Just before the elbow on the 6", the vent pipe increases to 8" diameter. I used aluminum tape and taped every joint and seam, so no fumes escaped through any of them.

Two steps forward and one step back again.
Now with all the venting done, I went back to level the machine up and couldn't do it. When I installed all the skin, I didn't have it level and when I tighten all the skin down, it made it too rigid. So I tried just loosing all the screws and it wasn't enough. I had to take the rear panel and the big panel on the front off and oblong a few holes. I got it level and tighten everything all up and did a finial mirror adjustment. I cut some 1/8" acrylic and it did a great job of cutting. The exaust extraction worked super well. All the fumes were sucked out and had no smell left in the room. The cabinet blower is strong enough that if any loose paper is in it, it gets sucked to the bottom vent. Good thing I put the screen wire over it.
Re: 450 X 900 60 watt build.
Posted: Fri Aug 20, 2021
by Rodney Edington
It's been a few months and I've used the laser a little bit so far,
When I cut the 8" square out acrylic, it looked good on the machinist square, but, I cut out a structure and found out it wasn't very square after all. I took some poster board and did a 18" square, just like Dave suggested earlier. I got it pretty damn close now.
Bought a compound lens and tried it, and found I had a huge (+.080) hump in the center of my bed. Made a dial Indicator holder that mounts to the lens tube, and put a sheet of .020" stryene on the bed (with the vacuum bed on) and got it so the whole bed is + or - .006". While I was doing all if this, I did another beam alignment and found the the 4th (right rear) corner was between 1/8" and 1/4" low. I tried raising that corner, but couldn't, so I went to the left front and lower it. Now I have the beam hitting the same spot on all 4 corners. It cuts very well anywhere on the bed now.
One of the structures I'm working now is a sawmill. Here is the mill I'm trying to make something close.


CAD of the framework

Parts cut

Framework


Re: 450 X 900 60 watt build.
Posted: Sat Aug 21, 2021
by Jeffrey Aley
VERY nice job on the sawmill!


